If your robot vacuum keeps stopping, misses dirt, or won’t charge, start with the symptom rather than assuming a part has failed. Similar-looking problems can have very different causes: a robot that won’t charge may have a power issue, a dirty contact, or a docking issue, and a robot that “misses spots” may be skipping a room or simply not picking up what it passes over. Use the guide below to find the first checks for your problem and decide what to do next. Exact steps vary by brand and model, so keep your manual or the manufacturer’s support page open as you go.
Find Your Robot Vacuum Problem
Pick the line that sounds like your robot. The second column is where to look first, not a confirmed cause.
| Symptom | Where to look first | Jump to |
|---|---|---|
| Won’t turn on or charge | Power, dock, contacts, status messages | Won’t Turn On or Charge |
| Stops during cleaning | Error messages, where it stopped, moving parts | Keeps Stopping or Gets Stuck |
| Gets stuck in the same place | Furniture gaps, cords, rugs, thresholds | Keeps Stopping or Gets Stuck |
| Moves but leaves dirt behind | Cleaning mode, bin, filter, brush | Doesn’t Pick Up Dirt |
| Can’t return to the dock | Dock surroundings, sensors, route | Can’t Find or Stay on the Dock |
| Misses rooms or loses its map | Task settings, map, surroundings, sensors | Misses Rooms or Has Mapping Problems |
| Won’t connect to the app | Network, app, model requirements | Won’t Connect to Wi-Fi or the App |
| Makes a new noise | Tangles, loose or misfitted parts | Makes an Unusual Noise |
| Won’t empty or mop properly | The dock’s emptying or mopping system | Auto-Empty or Mopping System |
Before You Troubleshoot: Record the Error and Recent Changes
A few minutes of note-taking can save you from trying fixes at random, and it gives support exactly what they will ask for.
Safety first. Before removing brushes, wheels, or other parts, stop the cleaning job and turn the robot off as your manual directs. Unplug the dock before cleaning its contacts.
Note the Model, Error Message, and When It Happens
Write down the brand, the exact model, and any voice prompt, app message, or error code word for word. Error codes don’t carry over between brands, and sometimes not between models of the same brand.
Also note when it happens: at startup, partway through a job, on the way back to the dock, or while charging. Then note whether it repeats under the same conditions. The location, the task, and the error message can help narrow down what to check next.
Check What Changed Before the Problem Started
Think back over the last few days. Did you move the dock or furniture, change your Wi-Fi network or password, wash or replace a filter or brush, install an app or firmware update, or add a rug or new obstacles? These are clues, not proof. Something changing just before a problem doesn’t mean it caused it, but it tells you where to look first.
Your Robot Vacuum Won’t Turn On or Charge
These symptoms can overlap. A robot that hasn’t charged may eventually stop responding, and a depleted battery is one possible reason a robot won’t turn on. Start with the checks below, and note which of these you’re seeing:
- No response at all. No lights, no sounds, nothing when you press buttons.
- It powers on but won’t start charging when placed on the dock.
- It shows charging but the battery level doesn’t rise the way you expect.
Check Whether the Problem Is Power or Charging
- Confirm the dock’s cord is firmly seated at both the wall and the dock, and try a different outlet.
- Seat the robot squarely on the dock and read any light, voice prompt, or app message.
- Leave it on the dock for the time your manual suggests, then try the power button again.
If the robot responds after some time on the dock, a very low battery was one possible cause. If the dock shows no power, or the robot gives no sign it is touching the dock, go to the contact check below. A light that stays off doesn’t always mean the robot isn’t charging, because some models dim their lights; confirm in the app or by voice prompt if your model has one.
Inspect the Charging Contacts and Docking Position
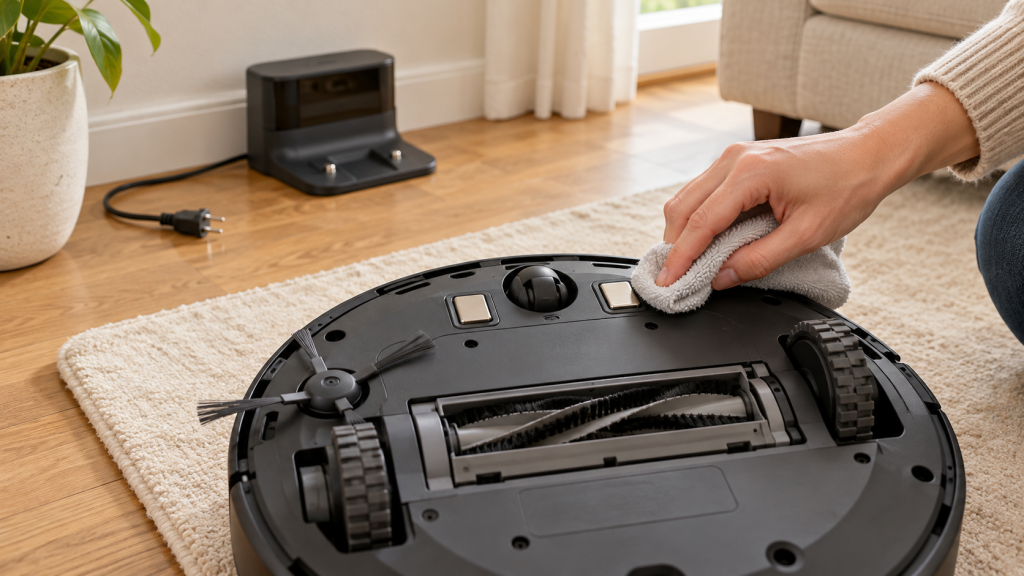
Look at the metal contacts on the robot and the dock for dust, hair, or residue. Check that the robot sits squarely rather than tilted, pushed too far in, or resting on a cord.
iRobot’s support page for Roomba and Braava models says to unplug the dock and use a clean, lightly dampened melamine foam sponge on the contacts of both the robot and the dock. That’s iRobot’s guidance for its own models. Other brands may recommend something different, so check yours before using any cleaning product.
Don’t carry that method over to sensors. iRobot’s care page for the Roomba 900 series, for example, says to wipe cliff sensors and sensor windows with a clean, dry microfiber or soft cotton cloth, and not to spray cleaning solution into sensor openings.
To verify, put the robot back, confirm that it reports charging, and check again later to see whether the level has gone up.
If It Still Won’t Charge
If power, dock, and contacts all check out, look up your model’s charging error list. Bent, melted, or discolored contacts, or a battery that won’t hold a charge, are reasons to contact support. Skip internet tricks like forced discharge or taking out the battery without instructions.
Shorter run time is a separate question. It also changes with cleaning mode, floor type, and job size, so compare like with like before blaming the battery.
Your Robot Vacuum Keeps Stopping or Gets Stuck
Where it stops is your best clue.
If It Stops in the Same Place, Inspect the Surroundings
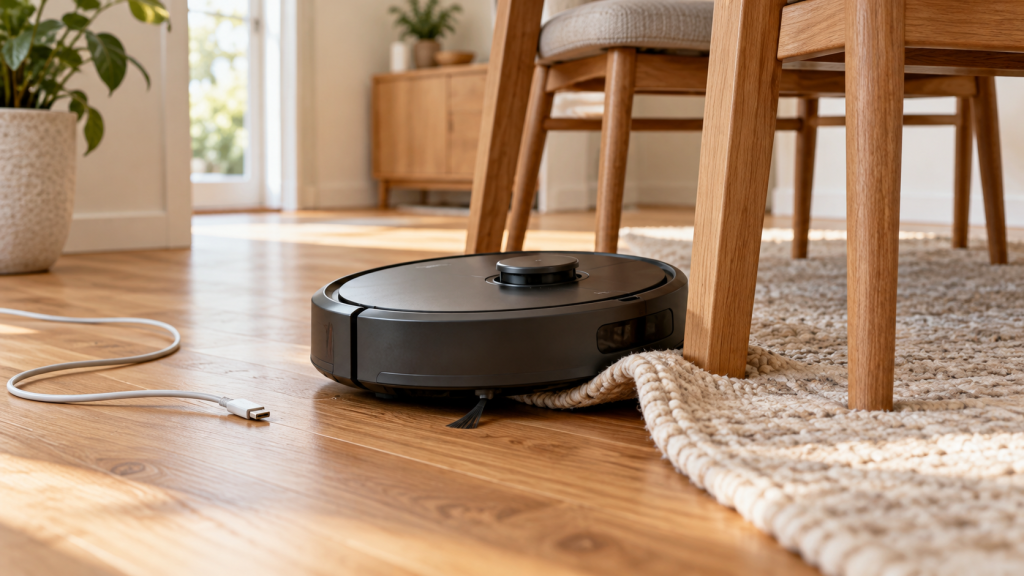
A repeat location often points to something in the environment, though it isn’t proof. Common culprits are chair bases and legs with tight gaps, low furniture, charging cables, rug fringe, curled rug edges, and door thresholds. Get down to the robot’s height and look at the spot the way it “sees” it.
Clear the spot and run a short test. If it no longer stops there, the surroundings were part of the problem. If it still stops, read the error message and move on to the moving parts below. If you can’t clear the area, many apps let you set a no-go zone around it, but then you’ll need another way to clean that spot.
If It Stops in Different Places, Check the Error and Moving Parts
Read the error message first. It may name a wheel, brush, or bumper. Then, with the robot off, check only the parts your manual says you can maintain: the main brush, side brush, wheels, and front caster if your model has one. Look for hair wrapped around axles, debris jammed in, or a part that isn’t seated.
If the message points to a part and it comes back after you clear it, or a wheel or brush won’t spin freely once it’s clean, stop and contact support.
Run a Short, Supervised Test After Each Change
Change one thing, then run the robot while you watch. Note where it stops and whether the message is different. If you change three things at once, you won’t know which one mattered. One clean run is encouraging, but it doesn’t prove the problem is gone for good.
Your Robot Vacuum Runs but Doesn’t Pick Up Dirt
“Doesn’t clean well” can mean two different things, and each has its own checks.
Separate Poor Pickup from Missed Coverage
Look at where the dirt is. If the robot drove over a mess and left it behind, that’s a pickup problem, so keep reading. If it never went near it, that’s a coverage problem, and a filter won’t help. Go to the mapping section below and check room access, settings, and the map.
Check the Bin, Filter, Brush, and Cleaning Mode
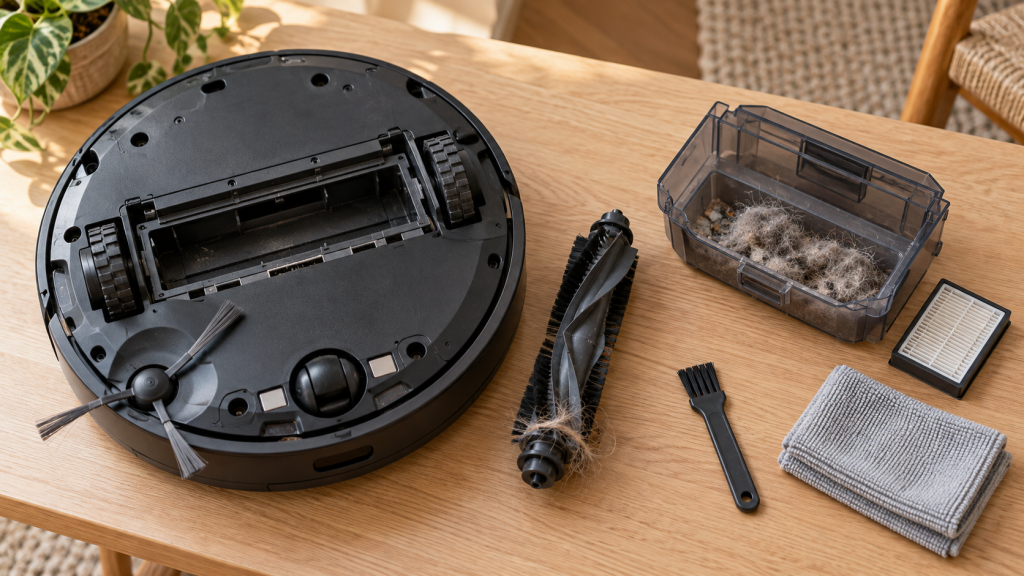
With the robot off, work through these in order:
- Mode. Quiet and low-suction modes are normal settings, so ask whether the current mode suits the floor and the mess. Compare it with a higher-suction mode on the same area.
- Bin. Empty it and check that it clicks in fully.
- Filter. Check whether it is clogged or installed incorrectly. Whether it can be washed, and how long it must dry, depends on the model.
- Brush. Look for wrapped hair or fibers, or visible wear.
Compare Results Under the Same Conditions
Test on the same type of floor with a similar job. Don’t deliberately feed the robot liquids, powders, or any unsafe test material. Judge by how it does on ordinary everyday messes. If pickup is still weak after all four checks, note which step you changed last and send that to support.
Your Robot Vacuum Can’t Find or Stay on the Dock
There are three separate steps here: finding the dock, lining up with it, and actually charging. Work out which one is failing, then follow the checks in order.
Check the Dock’s Position and the Route Back
If the robot can’t find its way back from a room, look at the route: closed doors, new obstacles, or a dock that now sits somewhere hard to reach. If it reaches the dock area but bumps around, the problem may be in lining up.
Placement rules differ by brand. Roborock’s support page, for example, says its dock should sit against a wall with at least 0.5 m clear on either side and 1.5 m in front. That’s for Roborock. Check your manual for yours.
Clean the Dock’s Signal Area and the Robot’s Sensors
Before thinking about the map, check the parts the robot uses to find the dock.
- With the robot off and the dock unplugged, find the dock’s signal area and the robot’s front or docking sensors in your manual.
- Look for dust, hair, or film, or something blocking them.
- Clean them the way your manual allows. Roborock tells owners to clean the dock’s front signal transmission area and the robot’s front sensor. iRobot’s care pages use a dry microfiber cloth for sensor windows, not the damp method used for charging contacts.
- Plug the dock back in, start the robot from its usual position, and watch whether it returns and lines up.
If it docks, repeat once more tomorrow before calling it fixed. If it doesn’t, go to the next check.
Check Whether the Dock or Map Has Changed
Moving the dock, carrying the robot to another room, or changes to the saved map may affect how it finds its way. Check whether the app shows the dock where it really is. If you moved the dock, let the robot run a normal job from it as your manual describes. Avoid deleting the map or restoring factory settings as a first move, because you may lose room divisions and schedules you’ve set up. If the map looks wrong, see the mapping section below.
Separate Docking Failure from Charging Failure
Parking next to the dock isn’t the same as docked and charging. After the robot returns, check that the app, light, or voice says it is charging. If it docks correctly but doesn’t charge, go back to the charging section above.
Your Robot Vacuum Misses Rooms or Has Mapping Problems
Rule out access, settings, and surroundings before you think about rebuilding the map.
Check Room Access and Cleaning Settings
Check that the doors to the missed rooms are open and the path is clear. Then review the job in the app: which rooms are selected, whether a no-go zone or virtual wall covers the area, and whether the schedule or job type is what you intended. If your robot supports multiple floor maps, make sure the right one is selected. If all of that is correct and the same area is still skipped, move on.
Look for Localization Problems, Sensors, and Recent Changes
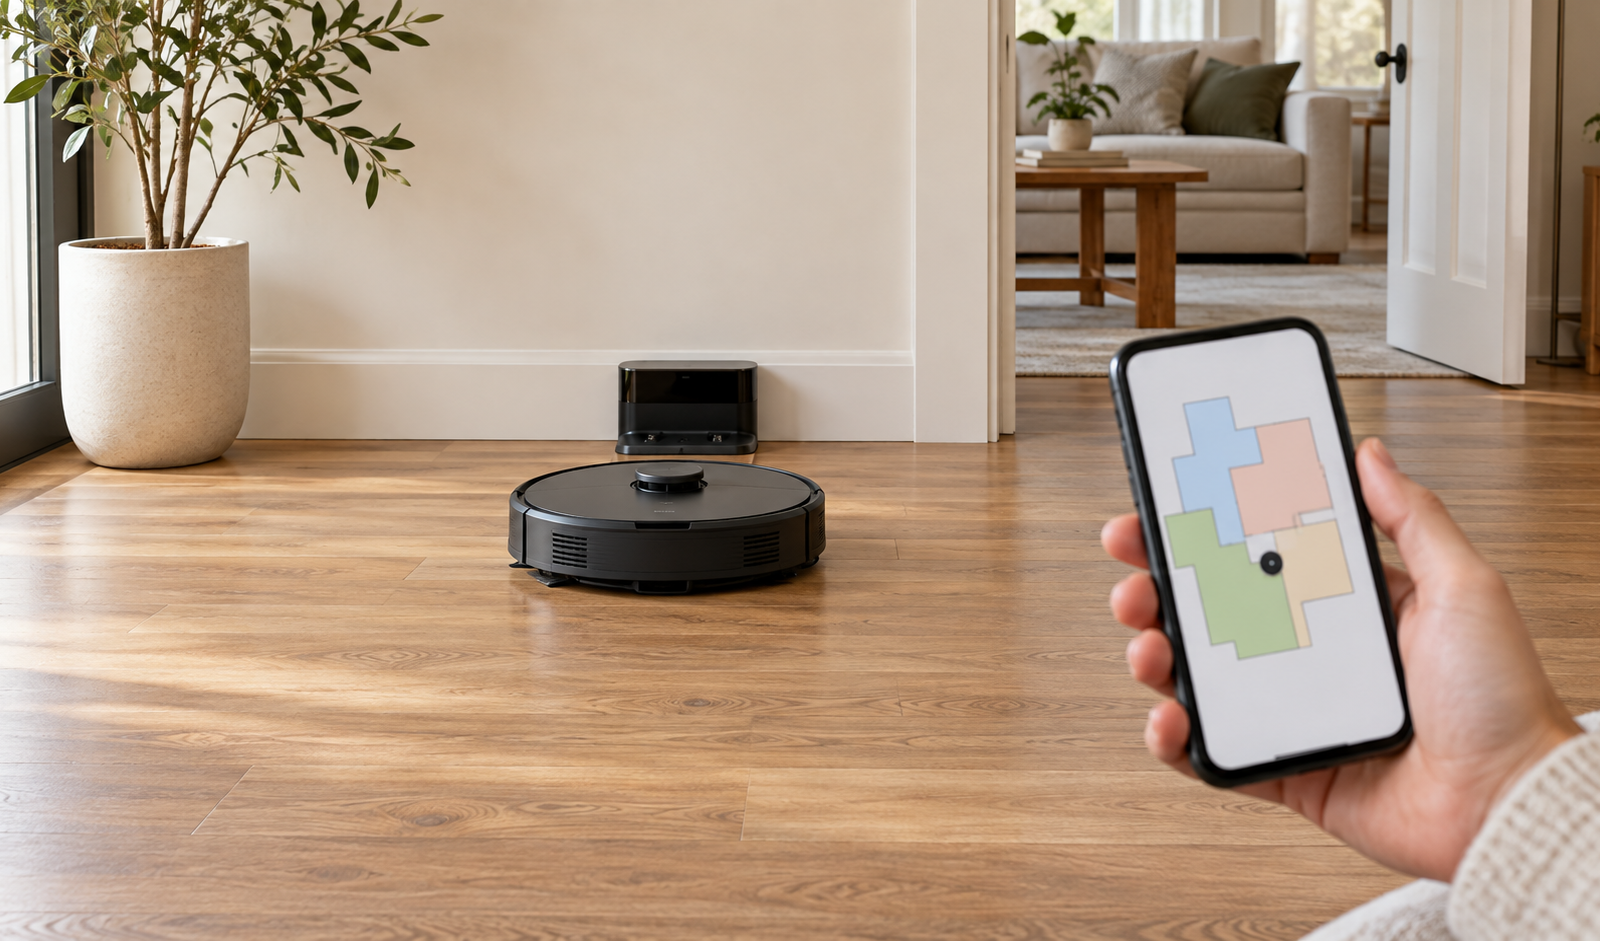
Localization means the robot’s sense of where it is on its map. When it goes wrong you might see its icon in the wrong room, a rotated or warped map, overlapping areas, or repeated “can’t locate” messages.
First check the navigation sensors your manual identifies, such as a lidar turret, cameras, or bumper and cliff sensors, for dust, hair, or blockage. Clean them only the way your model allows. Also look for new reflective or glossy surfaces, moved furniture, or changed lighting, and avoid picking the robot up and moving it mid-job. TP-Link’s Tapo guide says moving the robot or furniture mid-cleaning can create map errors.
Two community reports show what this can look like. One user on Wyze’s community forum described a robot that, 30 to 60 seconds into each job, placed itself and its dock in a different room. A reply said deleting the map and letting the robot remap worked for them. In a Roborock forum thread, a user said their S5 Max kept returning to the dock about a minute into whole-house jobs, skipping the same third of the house. Support suggested cleaning the wall and cliff sensors and moving the dock to a more central spot, and the user later traced the problem to their office chair’s chrome legs. These are single reports on specific models, not proven causes or fixes for yours.
When to Rebuild the Map
Rebuild only after the checks above haven’t helped, and check your model’s instructions first.
- Find out whether your model can save the map. TP-Link’s guide says some Tapo models have a Lock Map feature while the RV30 series uses Backup & Restore instead. Many models have neither, and a remap can erase room divisions, no-go zones, and schedules.
- Clear the floor, open interior doors, and put the dock in its normal spot.
- Start a mapping run as your manual describes, then set up rooms and zones again.
- Watch one full job and a second one the next day to see whether the map holds.
If it distorts again, send support screenshots of the map, the date it began, and what you’ve already tried.
Your Robot Vacuum Won’t Connect to Wi-Fi or the App
Identify Whether the Problem Is Pairing or Going Offline
Three situations need different first moves. If the robot still starts a job from its own buttons, that shows the cleaning hardware responds, but it doesn’t say why the connection failed.
- It never paired in the first place. Check that your phone is on the network and band your model supports, that the password is typed exactly, that the app is up to date and has the permissions its setup asks for, and that the robot is in pairing mode as the manual describes. Try again with the phone, robot, and router in the same room. If it still fails, send support the app version and the exact message.
- It stopped working after a router or password change. The robot may still be set to the old network. Use your model’s option for changing its Wi-Fi, which is different from a factory reset, and enter the new details. If that option isn’t in your manual, ask support before resetting.
- It worked before and now shows offline. Check whether other devices are online, restart the router, and check how far the robot’s usual spots are from it. Then look at the manufacturer’s service status page. If it stays offline, note when it began and any recent app or firmware updates.
Check the Network Requirements for Your Model
Look at your model’s setup guide for the supported Wi-Fi band, how the network name and password should be entered, the minimum app version, and the permissions the app needs. Not every model has the same rules. Don’t turn off your network’s security to get a device to connect.
Distinguish Reconnection from a Factory Reset
Reconnecting the robot to Wi-Fi updates its network details. A factory reset can erase saved maps, schedules, and settings. Button combinations and timings vary by model, so use the steps from your model’s own guide, and only after the checks above.
Your Robot Vacuum Makes an Unusual Noise
Identify When and Where the Noise Happens
Notice when it happens: while cleaning, when turning, when the brush spins, or while the dock empties the bin. A new sound is more informative than a robot that has always been loud. Try to describe it too, such as rattling, scraping, or grinding.
Inspect Accessible Parts and Stop if the Noise Persists
With the robot off, check the parts your manual says you can maintain for debris, hair, or a part that isn’t seated. Run a short test afterward. Don’t conclude the motor has failed from sound alone. If the noise continues, or you see damage, stop using the robot and contact support.
The Auto-Empty or Mopping System Isn’t Working
This section applies to robots with an auto-empty dock or a mopping system. Many models have only one of the two.
If the Dock Won’t Empty the Robot
Decide which one you’re seeing.
- The dock never starts emptying. Check that auto-empty is turned on in the app, and read your manual for conditions that skip it. Some models hold off during quiet or Do Not Disturb hours or when the robot returned without finishing a job. Then check that the dust bag or bin is installed correctly and isn’t full.
- It runs, but debris is still in the robot’s bin. Check the bag and bin seating, and look for blockages in any passage your manual lets you reach. Run another cycle and see whether the amount left changes.
If neither helps, send support a short video of the dock running or not running.
If the Mop Stays Dry or Leaves Too Much Water
Check the cleaning mode and water-level setting, make sure clean water is supplied (some models use an onboard tank, others draw from the dock), and see that the mop pad or plate is attached correctly. Change one setting at a time and check the floor after a short run. Don’t add cleaning solutions, vinegar, or other liquids unless your manual says to.
If the Dock Leaks or Doesn’t Handle Water Properly
Stop using the dock. If it’s safe to reach the plug, unplug it before touching anything. Then check only what’s safe from outside, such as whether tanks and covers are seated. Don’t open the dock or touch its internals. If it keeps leaking, contact support with a photo of where the water appears.
When to Contact Support
Recognize When Basic Troubleshooting Has Reached Its Limit
Contact the manufacturer when your checks keep failing, the same error returns, or a part is visibly damaged. Don’t keep repeating the same step.
Prepare a Useful Support Request
Have these ready:
- Brand and exact model
- The error message, word for word
- When it started and when it happens
- What you’ve tried, and what happened each time
- A photo or short video of the issue
- App and firmware versions, and any recent changes at home
Share your serial number or order details only through the manufacturer’s official, private channel.
Frequently Asked Questions
Should I Restart or Factory-Reset My Robot Vacuum?
They’re different. A restart typically just powers the robot off and on. A factory reset can erase maps, schedules, and network settings. Try a restart first if your manual lists it, and check what a reset removes on your model before doing it.
Why Does the Same Problem Keep Coming Back?
Often the cause is still there, whether that’s a layout, a dock position, or a setting, or the original cause was never confirmed. Note when the problem returns and compare it with what’s changed at home. If you can’t pin it down, send those notes to support.
How Can I Reduce Repeat Problems?
Keep brushes and bins clear, look over the contacts, sensors, and dock area from time to time, and clear cords and small items before runs. How often to do each depends on your manual, how much the robot runs, and whether you have pets or long hair at home.

Ethan Miller
Ethan Miller writes about home improvement, interior design, cleaning, and everyday living at Home & Living Daily. He shares practical tips and simple ideas to help readers create more comfortable and functional homes.