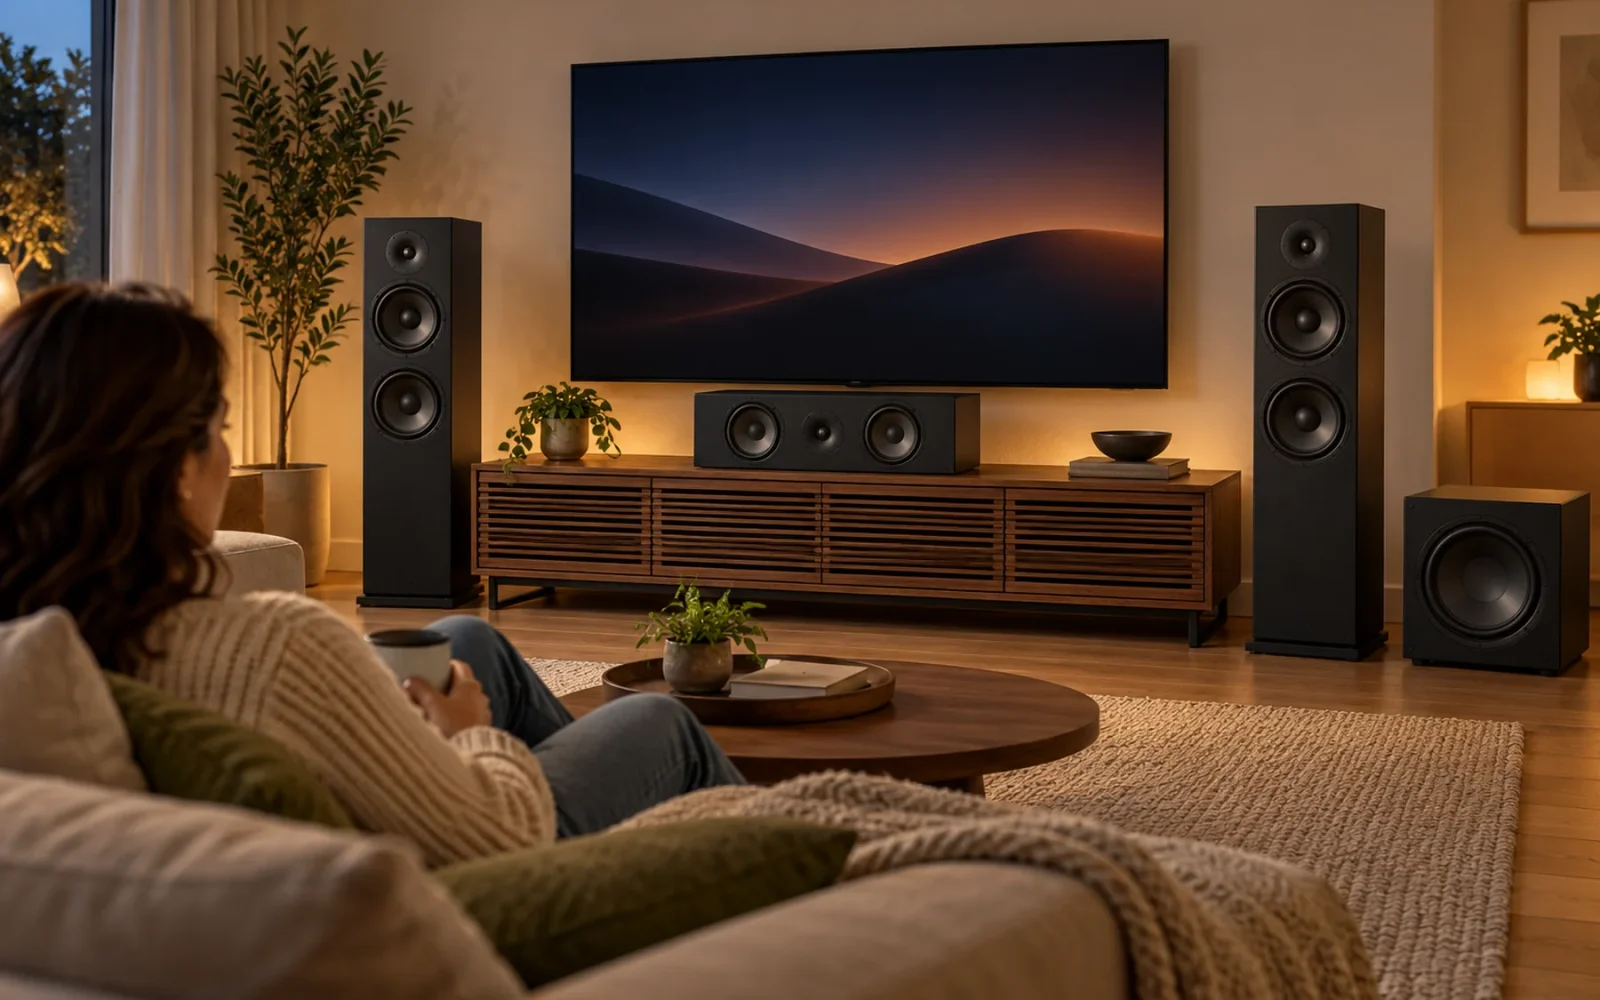
Set up a home theater by fixing the main listening position first, placing the speakers around it, connecting one complete signal path, and running the system's setup and calibration. Get a simple arrangement working before adding more speakers, sources, or automation.
For a receiver-based system, a practical starting point is 5.1: front left, center, front right, two surrounds, and a subwoofer. A compatible soundbar system offers a simpler alternative, but its connection and expansion rules differ from those of separate passive speakers and an AV receiver.
Choose the system you are actually installing
An AV receiver powers compatible passive speakers and handles source switching and audio decoding. A powered subwoofer normally receives its audio signal from the receiver's subwoofer output and needs its own power connection.
A soundbar contains amplification and its own control system. Add only surrounds and subwoofers supported by that system. “Wireless” surrounds may avoid a signal cable across the room while still needing nearby electrical outlets.
Inventory the equipment before buying adapters: TV model, receiver or soundbar, speakers, subwoofer, sources, and available connections. Check speaker impedance and amplifier compatibility in their manuals. A Bluetooth speaker is not automatically a usable rear channel, and speaker-level outputs should not be connected to an ordinary line-level input.
Do not buy height speakers solely because the box mentions Atmos. First establish how the processor supports them, the available amplified channels, and whether the room permits the intended layout. A correctly installed 5.1 system is a useful destination in its own right.
Place a basic 5.1 system around the main seat
Mark the seat where you want the most consistent result. Keep the front stage centered on the screen, with a clear path from speakers to listeners. Avoid placing the center speaker inside a closed cabinet or behind the TV.
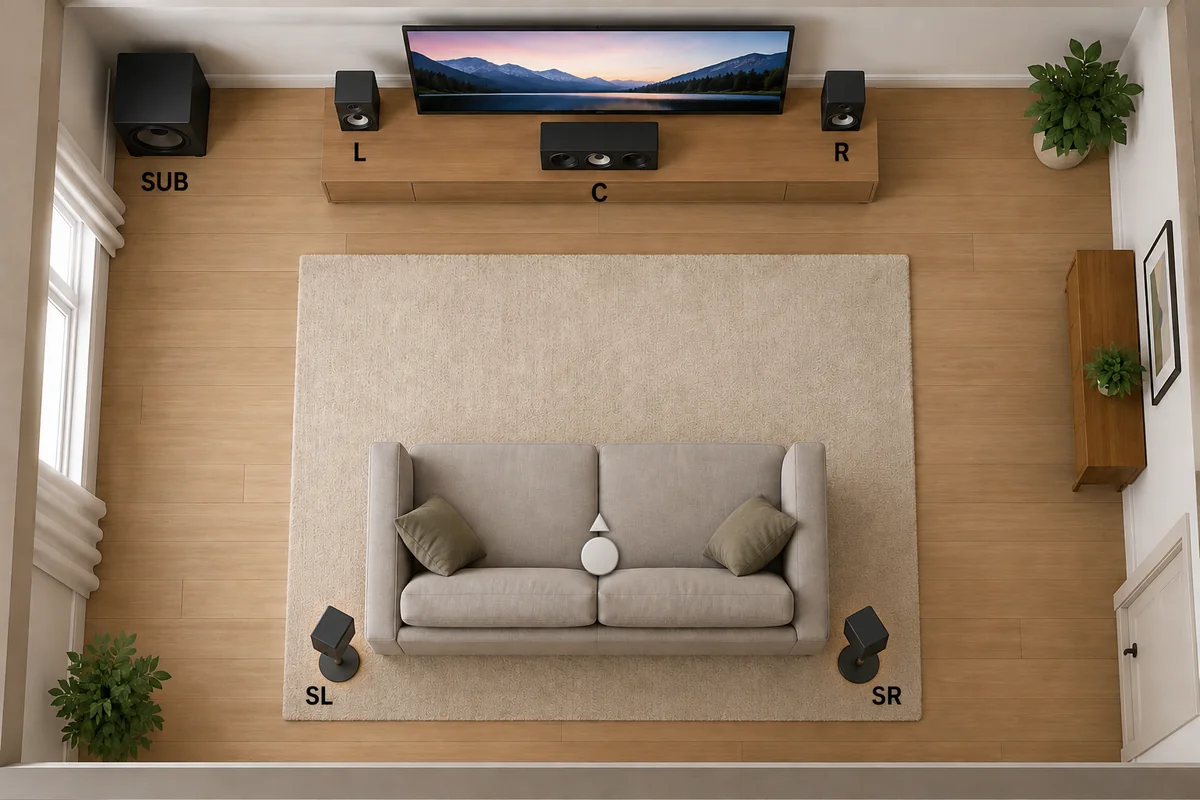
Dolby's 5.1 speaker placement diagram places the front left and right speakers about 22–30 degrees from the forward centerline and the surrounds about 110–120 degrees from it. In ordinary terms, the surrounds sit to the sides and a little behind the listener, rather than both directly behind the sofa.
| Component | Starting position | Common mistake |
|---|---|---|
| Front left and right | Either side of the screen, oriented toward the listening area | Pushing both close together under a wide screen |
| Center | Centered above or below the picture, directed toward listeners | Blocking it with furniture or a cabinet door |
| Left and right surrounds | Beside and somewhat behind the main seat | Treating them as distant back-wall speakers in a 5.1 layout |
Follow the speaker maker's placement instructions for height, clearance, and aiming. If the sofa is against a wall, choose a practical surround position and accept that the room sets limits. Do not solve an awkward room by putting every speaker at the front.
Subwoofer placement needs listening and measurement. A convenient front corner is a possible starting point, but it may produce uneven bass. Try permitted positions and compare more than one seat before securing the final cable route.
Keep the receiver ventilated and serviceable. Soft furnishings can reduce distracting reflections, but decorative foam is not a universal room correction treatment. Begin with sensible speaker placement and basic room furnishings before buying acoustic products.
Connect sources, the TV, and TV audio
With equipment powered off, choose the simplest supported connection route. For a receiver system, a common arrangement is source device to receiver HDMI input, then receiver HDMI output to TV. That lets the receiver process the source's sound while sending the picture to the display.

Sound from the TV's built-in apps travels in the other direction. ARC or eARC sends that audio back through the supported HDMI connection. Connect the TV port labeled ARC or eARC to the receiver or soundbar's designated TV/HDMI output connection, then follow both devices' audio-output settings.
For a concrete example, the Denon AVR-X1800H connection instructions show the TV's ARC/eARC port connected to the receiver's HDMI OUT. They also explain that the TV may need its eARC setting enabled. Copy the connection principle, not another model's menu settings.
If an older receiver cannot pass a video feature you need, a source-to-TV connection with supported audio return may be preferable. Check the complete path: source format, TV pass-through, connection, and receiver decoding. An Atmos logo on one component does not prove the whole chain will deliver that format.
Label cables at both ends and test them before hiding them. Use cable suitable for the required video mode and installation route. Avoid assuming a cable is faulty when the wrong input or an incompatible pass-through setting is the actual issue.
Wire speakers and run the setup assistant
Keep the equipment off while attaching speaker wire. Match the receiver's channel labels with the speaker locations and maintain consistent positive and negative connections. Prevent stray strands from touching adjacent terminals.
Connect a powered subwoofer through its specified line-level input and the receiver's subwoofer output. Use the manuals to establish the initial level and crossover-control position; do not apply one setting to every powered or passive bass system.
Run the receiver or soundbar's setup assistant. Confirm the installed speaker count, then use the test tones to verify that each channel plays from the correct physical location. Left and right are defined from the listening position facing the screen.
If a tone comes from the wrong speaker, fix the connection or assignment before calibration. Increasing a channel's volume cannot correct a swapped cable.
Calibrate, then check familiar material
Use the supplied calibration microphone and the manufacturer's procedure. Put the microphone at the specified listening height and position, keep the room quiet, and do not hold it in your hand during measurements unless the system specifically instructs that method.
Review the detected speaker layout and distances for obvious errors. A missing channel or implausible result deserves investigation. Crossover settings depend on the speakers and processor; 80 Hz is a common reference point, not a universal command for every system.
Play familiar dialogue and a known surround soundtrack at a comfortable level. Check intelligibility, balance, bass, and whether sound and picture stay synchronized. Compare ordinary TV audio as well as an external source, because they can use different paths and settings.
Record the successful settings before experimenting. If voices become quieter only on one app, investigate that app's soundtrack and output mode before moving all the speakers. Recalibrate after meaningful changes to speaker positions or the listening area.
Troubleshoot one path at a time
| Symptom | First check | Useful next distinction |
|---|---|---|
| Picture but no sound | Selected receiver input, mute, and output device | External source audio versus TV-app audio |
| Only stereo | Source soundtrack and reported input format | True two-channel content versus an output-setting limitation |
| One silent speaker | Channel test tone and cable connection | Setup or wiring problem versus missing content in that scene |
| Unreliable TV-app audio | Correct ARC/eARC ports and settings | Connection problem versus unsupported audio pass-through |
Make one change, repeat the same test, and keep the result. Randomly changing several HDMI and audio options makes it difficult to identify which correction mattered.
Conclusion
Finish with a system your household can turn on and use reliably: one clear source path, correct channel placement, and a calibrated listening area. Add more channels only after those fundamentals work. Better dialogue and dependable playback matter more than a larger speaker count that the room or connections cannot support.

Ethan Miller
Ethan Miller writes about home improvement, interior design, cleaning, and everyday living at Home & Living Daily. He shares practical tips and simple ideas to help readers create more comfortable and functional homes.