To make a garden path, mark a route you will actually use, choose a surface suited to the traffic, and prepare a stable, draining foundation before adding edging and the finished material. For a modest garden on fairly level ground, a properly contained loose-surface path is often a manageable project. Pavers, steps, steep slopes, and required accessible routes need more specific installation details.
The process below covers planning the route and building a simple gravel walking path. It does not assume that every garden needs the same excavation depth or that spreading stone over grass will create a durable walkway.
Walk the route before you mark the edges
Start with two useful destinations: a door and a shed, a patio and a vegetable garden, or a gate and a seating area. Walk between them carrying what you normally carry. A route that looks attractive on a drawing may feel awkward with a watering can or wheelbarrow.
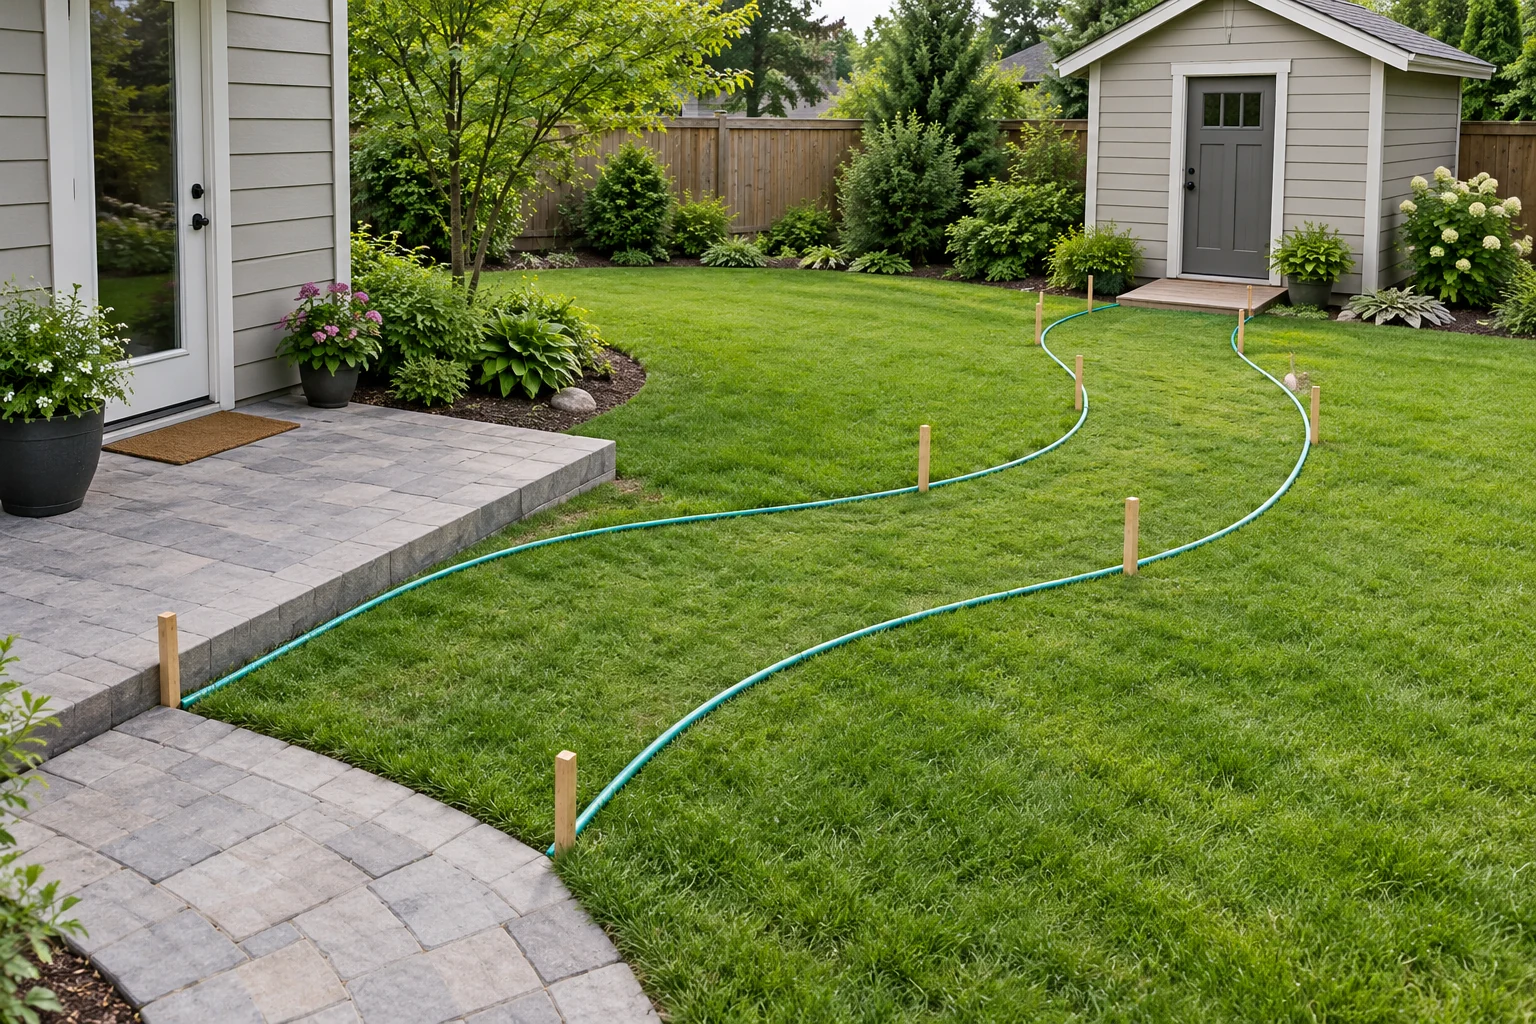
Use a hose, rope, or temporary markers to test both edges. Curves should respond to the garden rather than force an unnecessary detour. Garden designer Andy McIndoe’s path-planning advice starts with a destination and a logical route, which is a useful test before choosing materials.
Check gates at their full swing, door thresholds, steps, hose routes, and places where plants will spread. Test the narrowest section with the equipment and people who will use it. Do not count the space occupied by overhanging plants as clear walking width.
Where someone needs a mobility aid, select a suitable firm surface and have the route assessed for width, slope, transitions, and any applicable access requirements. An informal gravel or stepping-stone path is not automatically an accessible route.
Choose the surface for the way it will be used
| Material | Useful qualities | Tradeoffs to allow for |
|---|---|---|
| Wood chips or suitable organic mulch | An informal surface around growing areas; straightforward to spread | Breaks down, needs topping up, and can move with water or traffic |
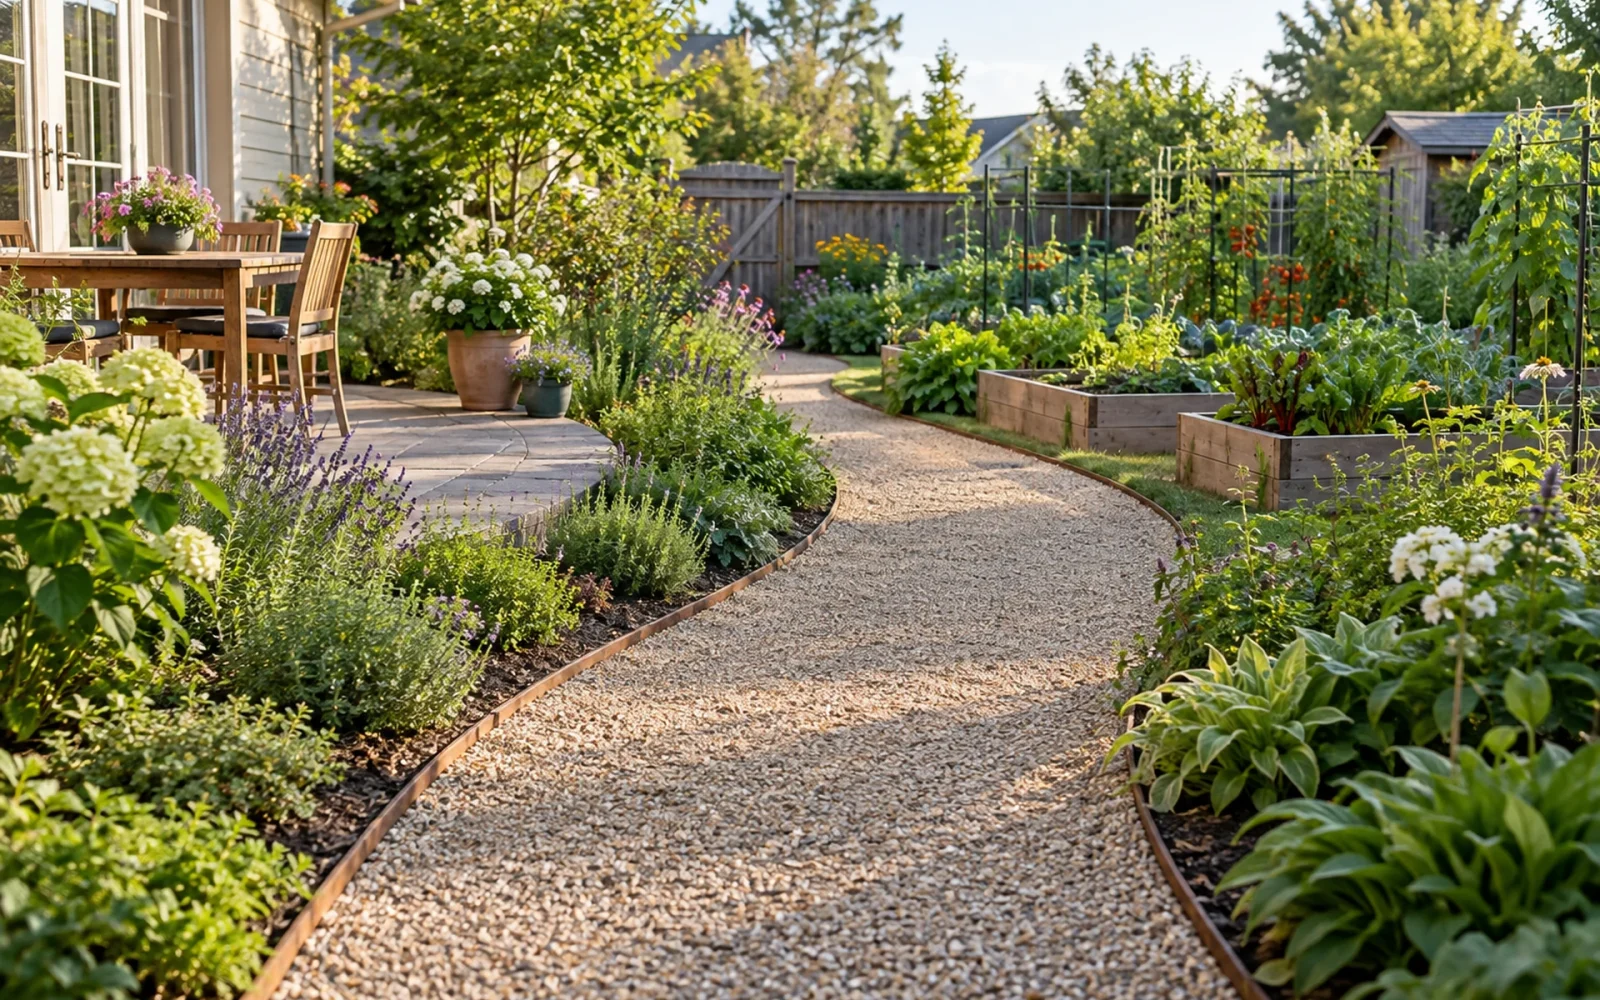
| Suitable gravel or crushed aggregate | Works with curved routes and can be repaired locally | Needs containment; particle type, depth, and base determine stability |
| Pavers or paving brick | A continuous modular surface with replaceable units | Needs a product-appropriate base, edge restraint, and joint detail |
| Natural stone or stepping stones | Can suit an informal garden and varied shapes | Uneven pieces, rocking, wide gaps, or wet surfaces can make walking less predictable |
For a gravel route, inspect the aggregate rather than choosing by color alone. Large smooth pebbles can roll underfoot; some small angular materials settle together more readily. Ask the supplier for a product intended for the kind of pedestrian path you are building, including whether it needs a stabilizer or a particular base.
Consider maintenance alongside the appearance. Leaves are easy to sweep from a suitable paved surface but can become mixed into loose stone. Mulch can blend naturally into a vegetable garden but needs renewal. The material comparison in LawnStarter’s garden-path guide also distinguishes the ongoing replenishment of organic surfaces from the work of maintaining aggregate or paving.
If you are considering volcanic stone, our patio-versus-walkway lava stone guide explains why finish, stable edges, and the installation system matter for a walking route. Stone names alone do not establish outdoor suitability.
Set the finished levels and water route first
Look at the site after rain if possible. Identify where water already travels and where it collects. A path should not become a trench that channels runoff to the house, nor should its edge trap water against a wall or across a doorway.
Work backward from the finished surface level. The selected surface and foundation layers must fit beneath it without creating an abrupt lip at the patio or gate. Ask for the installation detail appropriate to your soil, drainage, climate, and material. A layer specification for one region or paving product is not a universal gravel-path recipe.
Arrange utility locating before digging, and account separately for private irrigation or other owner-installed lines. Avoid disturbing substantial tree roots just to force the chosen alignment. Persistent water problems, steep grades, and steps are reasons to get a more detailed design before continuing.
Prepare and build a simple gravel path
Remove vegetation and establish a firm formation
After the route and utility checks are complete, mark the edges clearly. Remove turf and persistent weeds, and excavate enough space for the chosen layer arrangement. Do not bury a soft mat of grass or loose organic debris beneath the finished surface.
Shape the ground to the planned levels and drainage. Remove soft spots and follow the selected system’s preparation requirements. Do not compact saturated soil into a smeared surface or assume loose fill will remain at the level where it is first placed.
Install the foundation and edge restraint
Add the specified foundation material and compact it in manageable lifts using appropriate equipment. The required thickness depends on the site and the finished material. Check levels throughout, rather than trying to correct an uneven foundation with a very deep layer of loose decorative stone.
Install durable edging with its compatible fixings. It should contain the surface without leaving a sharp or unexpected projection into the walking line. Central Home Supply’s path guide explains the distinct roles of the foundation, drainage, and edging; those components should be selected as a system.
A permeable separator may be appropriate where the specified installation needs to keep aggregate from mixing with the soil below. It is not a substitute for removing persistent weeds or providing drainage. Follow the chosen system rather than automatically adding impermeable plastic.
Add the surface and check the transitions
Spread the selected aggregate evenly to its specified depth, then settle or compact it as directed for that product. More loose gravel is not always better: an overly deep surface can feel like walking through a pile rather than along a path.
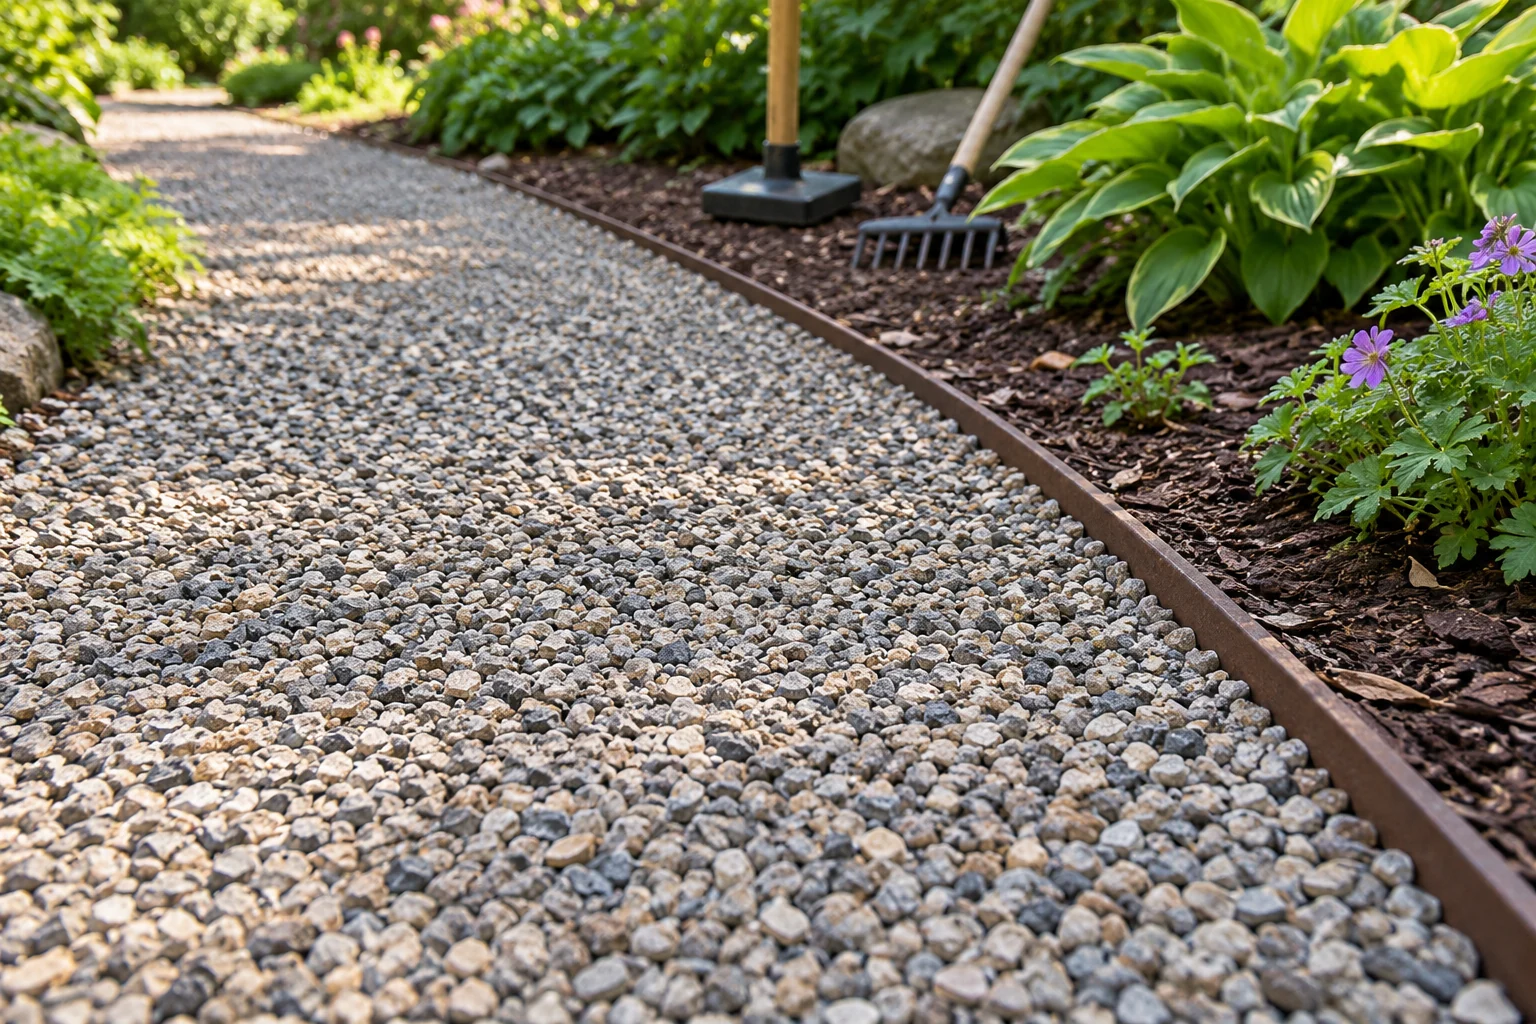
Walk the finished route, roll your equipment along it, and check the meeting points with paving, steps, or lawn. Correct rocking edges, unexpected level changes, and loose accumulations before treating the project as finished.
Calculate quantities by layer
For a rectangular section, multiply length by width by the relevant layer depth, using the same units. For example, a 30-foot-long, 3-foot-wide path with a 2-inch surface layer would contain:
30 × 3 × (2 ÷ 12) = 15 cubic feet, or about 0.56 cubic yard.
The 2-inch depth here illustrates the calculation; it is not a specification for every aggregate. Calculate foundation and surface materials separately. For curves and changing widths, divide the route into short sections and add their quantities.
Ask the supplier how the product is sold and how compaction, delivery loss, and the planned finish affect the order. Do not convert every material from volume to weight using one generic density.
Inspect it after rain and through the first season
Check for ponding, surface movement, and soil washing onto the path after the first substantial rain. Fix the cause of a recurring wet or soft area instead of repeatedly covering it with more gravel.
Remove leaves before they break down into the surface, pull small weeds before roots spread, and restore edging that shifts. Trim plants back to maintain the usable width. A path works best when it remains the easiest sensible way through the garden; if people keep cutting a corner, reconsider that part of the route before investing in a more permanent surface.

Ethan Miller
Ethan Miller writes about home improvement, interior design, cleaning, and everyday living at Home & Living Daily. He shares practical tips and simple ideas to help readers create more comfortable and functional homes.