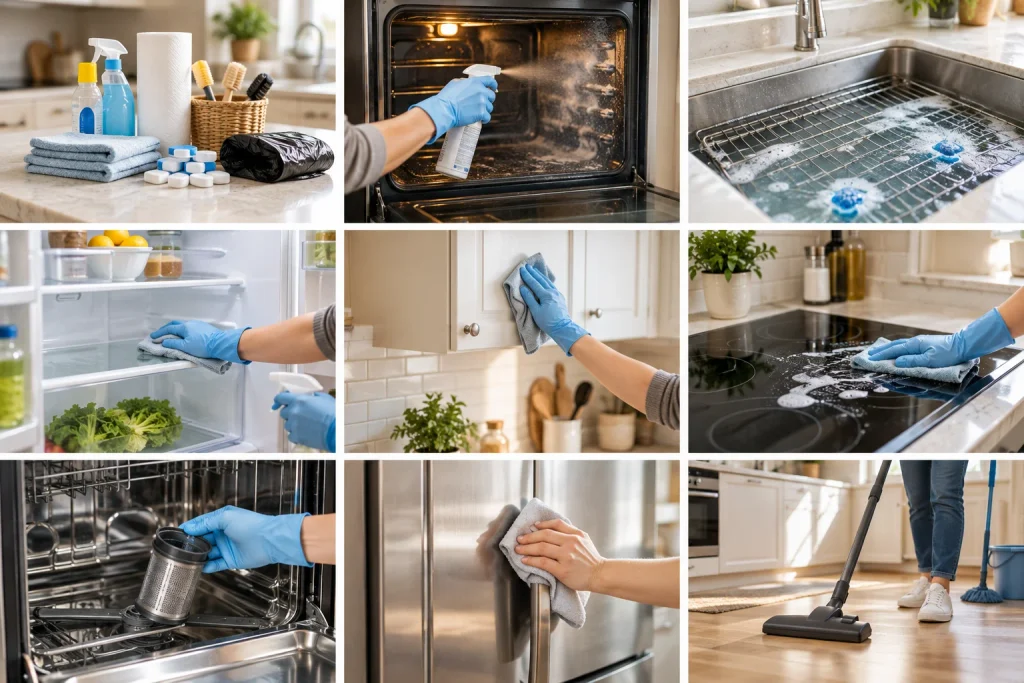
Deep cleaning a kitchen goes much more smoothly if you gather all your cleaning supplies ahead of time and start with the tasks that need time to soak or sit. A good approach is to begin with the oven and refrigerator, then work through the rest of the kitchen from top to bottom and from left to right.
Try to keep the sink clear during the process because you’ll need to use it for many of the cleaning steps. For that reason, it’s best to leave the sink until the very end.
Get Everything Ready Before You Start
Gather all the cleaning supplies you’ll need and bring them into the kitchen so you don’t have to stop halfway through to look for something.
For this deep clean, you may need oven cleaner, garbage bags, dishwasher detergent tablets, cleaning cloths or paper towels, and products for cleaning the stovetop and stainless steel surfaces.
Next, identify anything that needs to soak or any cleaning product that needs time to sit. Oven racks can soak while you clean other areas, and oven cleaner also needs time to work. The refrigerator is another time-consuming job, so it makes sense to start it early.
If your oven and refrigerator haven’t been thoroughly cleaned in a long time, you may even want to clean them on separate days from the rest of the kitchen.
Clean the Oven and Soak the Oven Racks
Spray the Oven Cleaner First and Come Back to Scrub Later
Start by removing the oven racks.
Place garbage bags on the floor underneath the oven to catch any cleaner that may drip. Keep an eye out for leaks so the product doesn’t damage the flooring.
Spray the inside of the oven evenly with oven cleaner, then turn on the range hood or another ventilation system to reduce your exposure to fumes.
Let the cleaner sit for about 20 minutes. If you’re deep cleaning the entire kitchen, spray the oven first and then move on to the refrigerator or cabinets. You can come back to the oven about 45 minutes later.
Scrub the inside of the oven and wipe away the cleaner.
If there is a lot of baked-on grease and grime, you may need to spray it again and repeat the process. Oven cleaners often need to soften stubborn buildup layer by layer.
Next, wipe away any remaining cleaner using a damp cloth or damp paper towels. If the oven cleaner dries and leaves behind a white residue, wipe the area again with clean water.
If you’re still concerned about residue after thoroughly scrubbing and rinsing, you can briefly heat the oven for a few minutes.
Finally, clean the oven glass with Windex and a polishing cloth or paper towel.
Soak the Oven Racks While You Clean the Rest of the Kitchen
Fill the sink or a large container with water and add 3 to 4 dishwasher detergent tablets, then place the oven racks in the water to soak.
If you’re soaking them in a bathtub, place a towel underneath the racks first to prevent scratching the surface.
Sometimes I let the racks soak overnight. If I’m cleaning a client’s home, soaking them for 3 to 4 hours usually works quite well.
Clean the Refrigerator One Shelf at a Time
Instead of emptying the entire refrigerator at once, clean it one shelf or drawer at a time:
- Remove everything from the shelf or drawer.
- Vacuum up any crumbs or debris.
- Wipe the area clean.
- Put everything back before moving on to the next section.
This method makes the job much easier to manage because you don’t have to empty the entire refrigerator all at once.
When cleaning the kitchen, hot water works well for many surfaces. If additional disinfecting is needed, you can also add a small amount of bleach to the water, as long as it is appropriate for the surface and used safely.
Move on to the Cabinets and Cooking Area
Wipe Down the Cabinets and Kitchen Walls
Once the oven and refrigerator are underway, continue cleaning the rest of the kitchen from top to bottom and from left to right.
Wipe down cabinet doors, the inside of the cabinets, and the wall or backsplash behind the stove. Hot water is one of the cleaning methods Sarah often uses for these areas as well.
During a more thorough spring or fall deep clean, she may also remove everything from the cabinets, sort and declutter the contents, wipe down the interiors, and then put everything back.
Soak the Range Hood Filters and Clean the Stovetop
Remove the filters from the range hood because grease from cooking gradually builds up on them.
You can soak the filters using Mr. Clean, Dawn Powerwash, or hot water mixed with dish soap.
When cleaning the countertops, don’t simply wipe around the items sitting on them. Move everything out of the way and thoroughly clean the surface underneath.
Then clean the stovetop.
I have a glass stovetop, so I spray it with oven cleaner, wipe it off, and then finish with Windex. Different types and materials of stovetops require different cleaning methods, so always use a method that is appropriate for your particular surface.
Clean the Light Fixtures and Windows
Continue working through the kitchen by cleaning the light fixtures.
I usually start by dusting them with a Swiffer. If there is a lot of dust, I may use a vacuum instead. If the fixtures are coated in grease, they will also need to be wiped down.
Grease in the kitchen makes dust stick to surfaces very easily, and this is especially noticeable on glass light fixtures.
Clean the windows as well, particularly any window above the kitchen sink. Food, water spots, and grease can easily splash onto the glass while dishes are being washed.
Finish with the Dishwasher, Stainless Steel, and Sink
Check the Dishwasher
First, check whether your dishwasher has a filter that needs to be removed and cleaned manually.
Some dishwashers do not have removable filters because they use a built-in food disposal system. So if you can’t find a filter, it doesn’t necessarily mean anything is missing.
Check the manufacturer’s instructions using the brand and model number of your dishwasher.
Wipe down the outside of the dishwasher, then run a cleaning cycle according to the manufacturer’s instructions. If using bleach, make sure it is compatible with your dishwasher and never mix it with other cleaning products.
Polish All Stainless Steel Surfaces Together
I like to leave all stainless steel polishing until the end.
I use Weiman Stainless Steel Cleaner to remove water marks, stains, and heat marks while restoring shine to the surface.
This is more of an occasional deep-maintenance step rather than something that needs to be done every day.
Clean the Sink Last
Because you’ll be using the sink repeatedly throughout the entire kitchen-cleaning process, it makes sense to save it for last.
Rinse the sink thoroughly, scrub it clean, and then disinfect it using an appropriate cleaning product.
Finish with the Countertops and Floors
Once the sink is clean, give all the kitchen countertops one final wipe-down.
Move items off the counters so you can clean underneath them properly rather than simply wiping around the edges.
By this point, the floor will probably have collected plenty of dust, crumbs, and dirt from everything you cleaned above.
Vacuum the floor thoroughly first, then mop it.
Cleaning in the Right Order Makes the Job Much Easier
Starting with the oven and soaking the oven racks early allows the cleaning products and soaking process to work while you move on to other parts of the kitchen.
As you clean the rest of the kitchen, work from top to bottom and from one side of the room to the other. Keep the sink until the end because you’ll need it throughout the process.
Finally, wipe down the countertops one more time, vacuum, and mop the floor. That way, you can remove all the dust, crumbs, and grime that fell during the deep-cleaning process and finish with a completely refreshed kitchen.

Ethan Miller
Ethan Miller writes about home improvement, interior design, cleaning, and everyday living at Home & Living Daily. He shares practical tips and simple ideas to help readers create more comfortable and functional homes.