To measure for replacement windows, first establish what the measurements will be used for. An estimate can start with approximate existing-window dimensions. A final order needs the measurements and allowances specified for the chosen product and installation method. Those are not always the same numbers.
For a typical insert replacement that keeps a suitable existing frame, you will usually record width and height at several points, check available frame depth, and compare the diagonals. Keep the original readings. Before ordering, have the supplier or installer confirm the measurement reference points and who is responsible for the finished size.
Decide whether you are measuring for a quote or an order
Manufacturer guides can appear to disagree because they serve different purposes. Pella’s initial-measurement guide, for example, describes measurements for estimating a project and says a professional will confirm them before the products are built. That is different from a product-specific order worksheet.
Write the purpose at the top of your notes: “estimate only” or “final sizing for this product.” For an estimate, avoid dismantling trim just to obtain a number you will still need to have checked. For an order, get the actual measuring document for the window series and replacement method.
An insert or pocket replacement fits within an existing frame that remains. A full-frame replacement removes more of the old assembly and uses a different installation interface. Neither the visible glass nor the outside edges of decorative trim automatically define the required order size.
Make a record for each opening
Use a rigid tape measure, a pencil, a level if needed, and a simple room-by-room sheet. A helper can hold the tape or repeat the reading back. Identify openings from a consistent position, such as “kitchen, north wall, left window, viewed from inside.”
Measure every opening individually, even when adjacent windows look identical. Note whether it is double-hung, sliding, casement, fixed, or a combination unit. Photograph the whole window and the points you measured so a supplier can interpret your notes.
| Record | What to write down |
|---|---|
| Opening ID | Room, wall, position, and viewing direction |
| Width | Top, middle, and bottom readings |
| Height | Left, center, and right readings |
| Depth | Usable depth at the reference points in the product guide |
| Diagonal checks | Both corner-to-corner readings and any visible distortion |
| Condition and purpose | Frame problems, window type, estimate or order, and who will verify |
Take width and height readings at the correct frame surfaces
On a conventional framed opening, the side jambs are the vertical frame surfaces. The head is at the top; the sill is at the bottom. Locate those parts before extending the tape. Measuring the glass, the movable sash, or decorative casing can produce a plausible-looking dimension that describes the wrong thing.
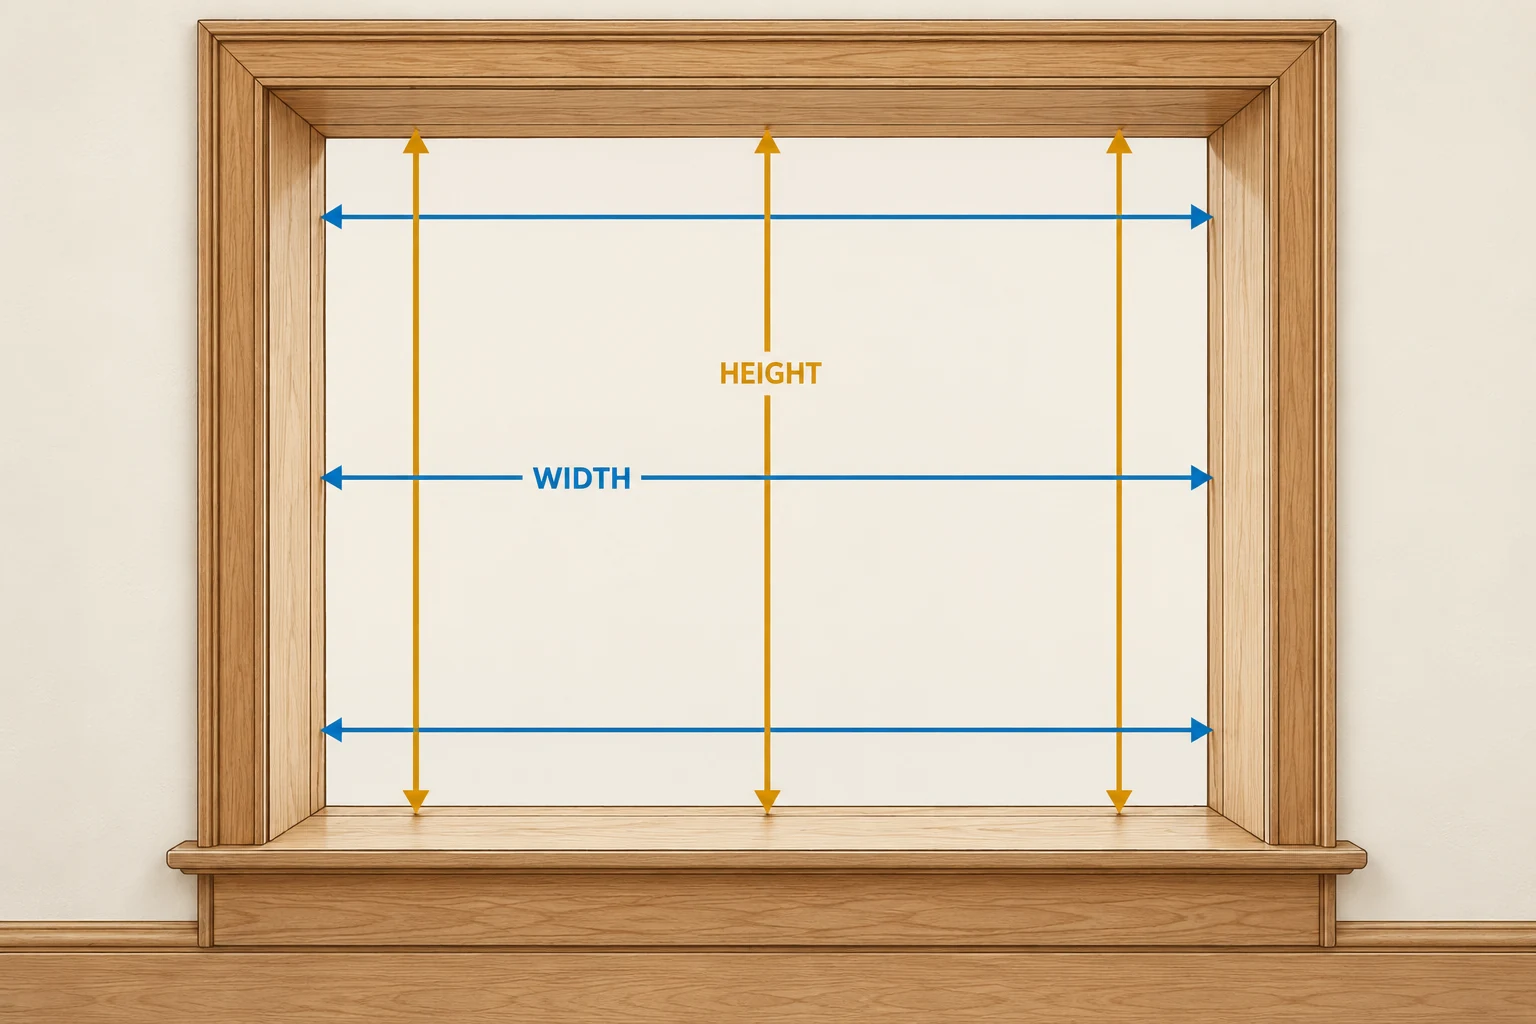
Width: top, middle, and bottom
For the common insert-measuring approach described in Lowe’s replacement-window guide, measure between the side jambs at three heights. Keep the tape straight rather than diagonally across the opening, and record each reading.
If the widths are 30⅛, 30, and 30¹⁄₁₆ inches, the smallest observed width is 30 inches. That tells you about the opening’s limiting width under this method. It does not, by itself, establish the final manufactured width or any installation clearance.
Height: left, center, and right
Measure from the appropriate sill surface to the head at three positions. On a sloped sill, the correct starting point matters; do not substitute an interior projecting stool for the sill reference specified by the measuring guide. Record all three heights and identify the smallest where that method calls for it.
A broken pane does not change these reference points. If you need glass or a sealed glass unit rather than a whole replacement window, you need a different measurement process and specification.
Check depth, squareness, and the frame you intend to keep
A window can have the right width and height yet be unsuitable for a particular insert. Available depth, stops, tracks, hardware, and the remaining frame affect how the new unit fits. Check the required usable depth in the chosen product’s instructions rather than treating one generic minimum as universal.
Measure both diagonals between the specified opposing corners. A difference suggests the opening is not square, but a diagonal check does not replace checking for bowing, level, or plumb. Andersen’s measuring guide includes a squareness check as part of its process. If the readings or frame condition are questionable, let the installer assess how that affects the installation method and size.
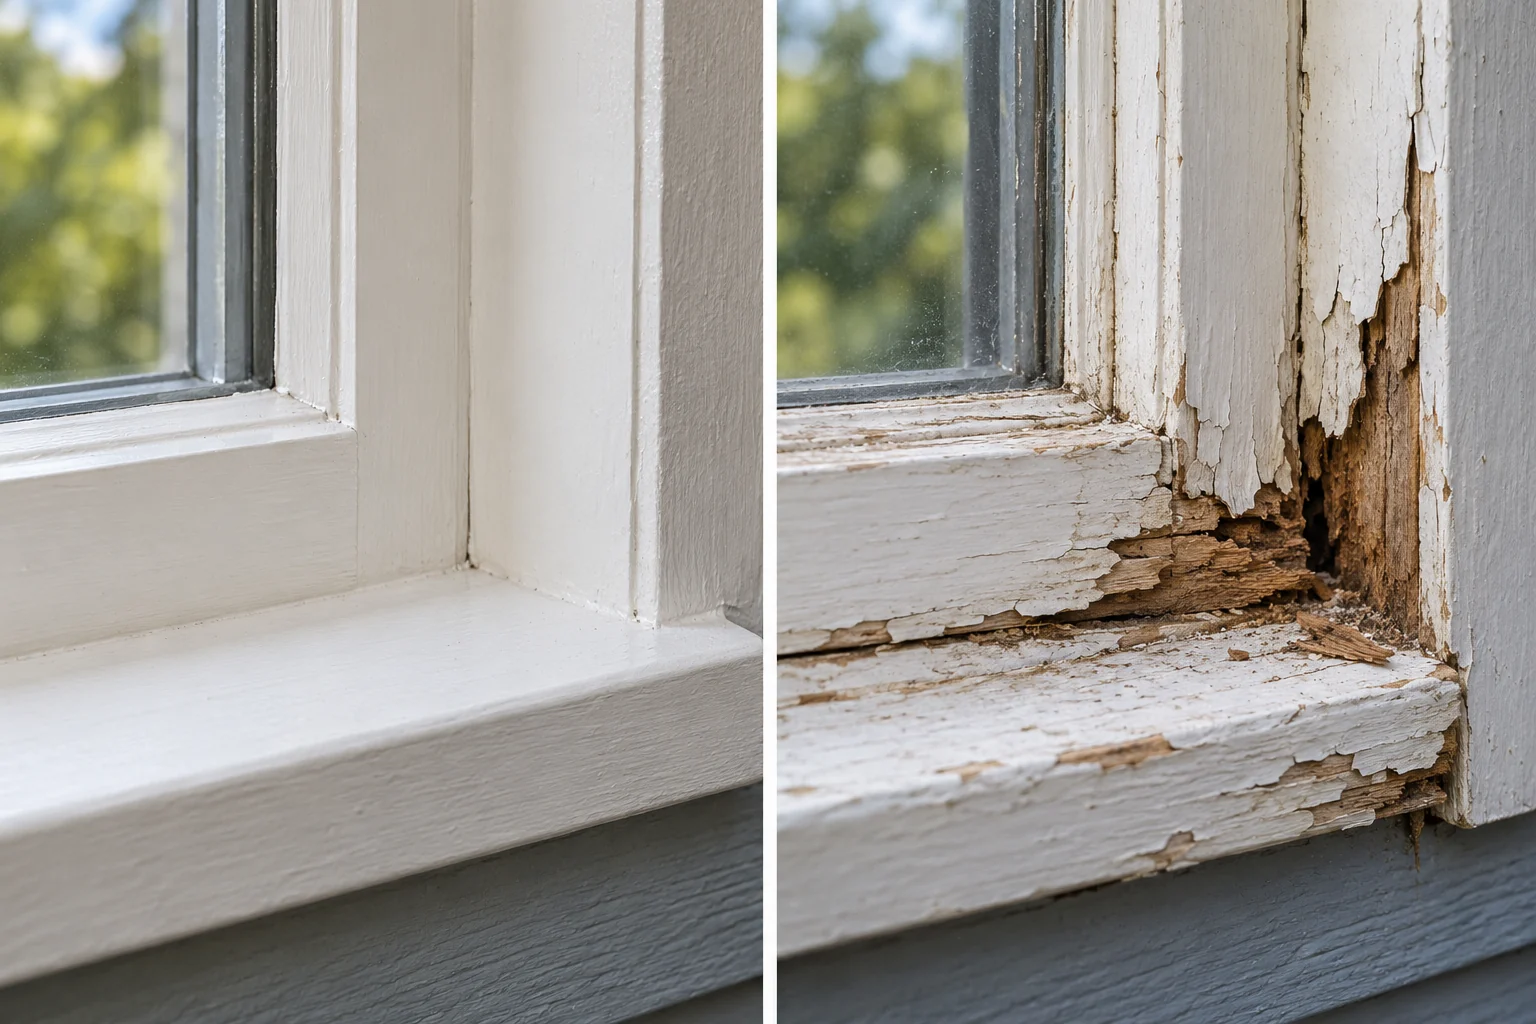
Look for deteriorated wood, loose joints, water staining, and a sill or frame that no longer provides a sound installation surface. Do not assume an insert is the appropriate solution simply because keeping the frame would be less disruptive. The condition of the retained assembly needs to be part of the decision.
Do not turn a field measurement into an order size by guesswork
Ask whether the supplier wants the opening size, the existing frame size, or the finished unit size. Then ask who applies any clearance allowance. Subtracting a quarter inch automatically, and then having a supplier subtract an allowance again, can leave you with an unnecessarily small unit. Adding a guessed adjustment to an out-of-square frame can be just as troublesome.
Keep units and the order of dimensions consistent. Write “width × height,” retain fractions or decimals as required, and avoid rounding an order measurement just because an estimating guide rounds its preliminary figures. Have the supplier read the proposed order back against the correct opening ID.
The final check should cover the window series, installation type, dimensions, handing or operating direction where relevant, and the party that has verified the size. A correct measurement attached to the wrong room is still an expensive mistake.
Do replacement windows come in standard sizes?
Some product lines have standard sizes and others allow made-to-order dimensions. A nominal size on a display or order form is not always the exact unit dimension. Use the sizing document for the specific series; do not enlarge the assumed fit simply because the closest stock size looks convenient.
For bay or bow assemblies, combination units, unusual shapes, damaged frames, or a change in opening size, arrange product-specific measurement rather than extending a rectangular insert checklist to a different assembly.
Your most useful handoff is a clearly identified set of original measurements, photographs, and condition notes. Treat final sizing as a verified step in the order, with an agreed method and responsibility, rather than the last number you happen to write on the tape-measure sheet.

Ethan Miller
Ethan Miller writes about home improvement, interior design, cleaning, and everyday living at Home & Living Daily. He shares practical tips and simple ideas to help readers create more comfortable and functional homes.